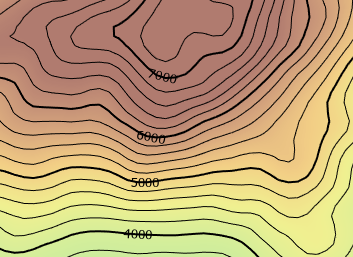
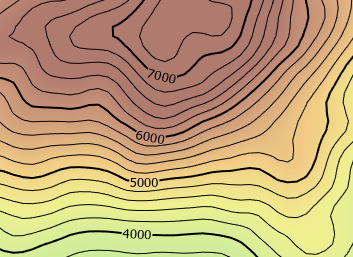
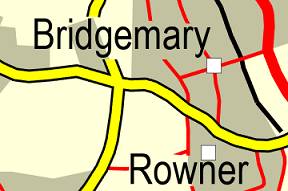
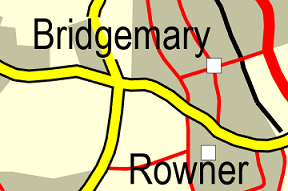
Masking is a technique used to clarify dense or detailed map content by having the features of one layer hide, or mask, features of another layer where they overlap. A common use for masking is to mask features around annotation to ensure the text remains readable.
For example, in a hypsometric elevation map like the one below, contour lines and text may conflict. Masking portions of the black contour lines retains the elevation message of the map and makes the contour text more legible. 

There are two types of masking strategies:
- Layer masking—A layer of features or masking layer masks any overlapping features of another layer in the map or scene.
- Feature-level masking—Masking is handled for each feature as specified by a relationship class between two layers.
With both ways of masking, the geometry of the masking features masks the symbology of the masked features. Even if the symbolized shape of the masking features differs from the geometry (for example, if a symbol buffer is applied), the shape of the feature geometry does the masking. However, the symbology of the masked features is impacted. A masked feature may appear to have holes, but they are only holes in the visible symbol. The feature geometry is unchanged.
Create a masking layer
Any feature layer can be masked, but only polygon feature layers can mask features. Because of this, you may need to create a masking layer for your feature layer.
Note:
3D layers in a scene cannot be masked, but they can be used as masking layers.
Several geoprocessing tools can be used to create masking layers, including:
These tools can be used on any applicable layer in your current map or scene. A polygon feature class is generated as output in a geodatabase, which is then used to mask out portions of layers that lie underneath certain symbols or annotation features.
The mask first identifies a margin, or the area between the feature and the edge of the mask, and then uses an outline method to create the mask's polygon. To learn more about masking layer tools and their purposes, see An overview of the Masking toolset.
To create a masking layer for your feature layer, follow these steps:
- On the Analysis tab, in the Geoprocessing group, click Tools
 .
. - In the Geoprocessing pane, browse to Cartography Tools > Masking, and click the desired tool to open it.
- Set the parameters and run the tool.
A polygon feature class is added to the contents pane.
Use layer masking
You can mask the symbolized features of the selected layer with the features from one or more mask sources in the map or scene. For example, to mask administrative boundaries over a body of water, select the polygon feature layer containing the administrative area boundaries and check the box for the layer containing the water feature in the Masking drop-down menu.
To mask a layer, follow these steps:
- Choose one or more layers to be masked in the Contents pane.
- Under Feature Layer, on the Appearance tab, in the Drawing group, click Masking
 .
. - In the drop-down menu, check one or more layers in the list. The layers with check marks will mask the selected layer.
Mask layer symbols
You can further define how the layer is masked by masking only certain symbols of a layer. For example, in a line feature layer of roads in which each type of road is symbolized differently, you can specify which layers of the highway symbol to mask, rather than masking the entire highway. 

You can use symbol layer masking on a feature layer or group layer as long as there is a polygon feature layer in your map.
Note:
Symbol layer drawing must be enabled on the layer to use symbol layer masking.
To mask the symbols of a layer, follow these steps:
- Choose the feature layer you want to apply masking to in the Contents pane.
- Under Feature Layer, on the Appearance tab, in the Drawing group, click the Masking drop-down menu
 and click Advanced Masking.
 - On the Advanced Masking dialog box, in the Mask sources check box list, check one or more mask sources.
- In the Symbol layers list, each symbol layer in the feature layer selected from the Contents pane is listed. Check the symbol layers to mask with the highlighted mask source or sources.
- Click OK to apply the mask to the symbol layer or layers.
Use feature level masking
You can establish masking for individual features by setting up a many-to-many relationship class between a masked layer and a masking polygon layer. The relationship class is used to link masking polygons with specific masked features.
One way to get feature level masking is to use geoprocessing to discover feature conflicts and build the masks for you. Use the Create Overpass or Create Underpass tool to identify conflicts, generate mask polygons, and set up relationships automatically. You can edit the resulting masking polygons and create new masks if necessary.
Alternatively, you can use an existing polygon feature class and create a many-to-many relationship class between it and the masked layer using the Create Relationship Class tool.
To set up feature level masking, follow these steps:
- Ensure that a masking polygon feature class is present in the map, along with a many-to-many relationship class relating it to the masked layer. You can turn on the masking polygon features in the Contents pane to see the features, but turn it off when masking is applied to reveal the masking effect.
- Click the feature layer you want to apply masking to in the Contents pane.
- Under Feature Layer, on the Appearance tab, in the Drawing group, click Symbology to open the Symbology pane.
- Click the Advanced symbology options tab
 .
. - Expand the Feature level masking heading, and check a relationship class to enable masking. You can activate multiple relationship classes if more than one is available.
The masking polygons mask the features of the current layer.