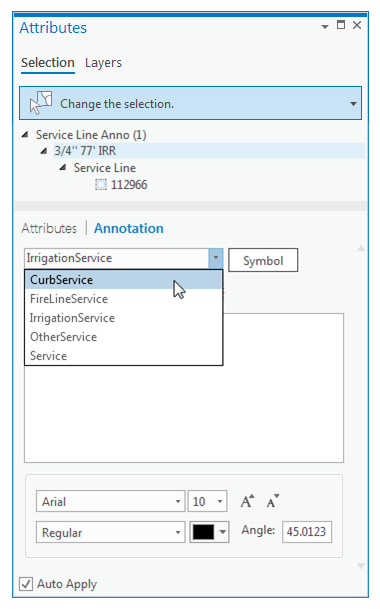
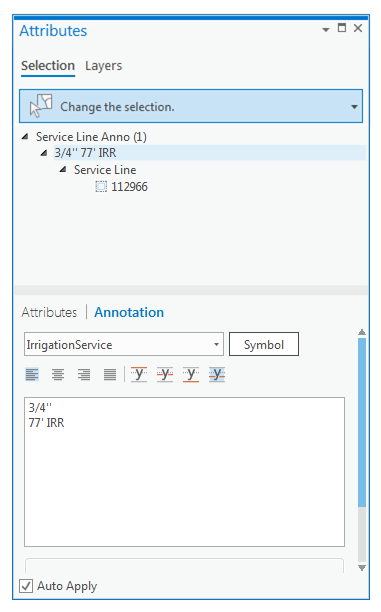
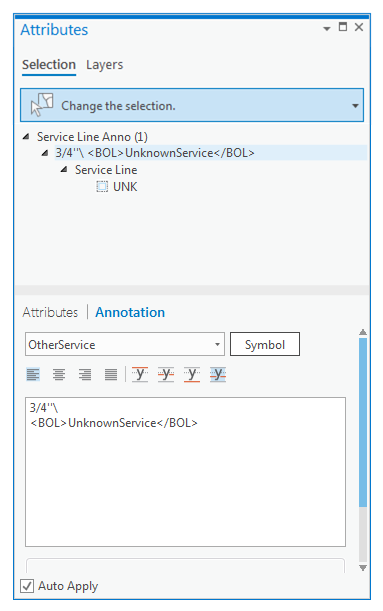
In the Attributes  pane, on the Annotation tab, you can change the subtype or font format and edit symbol properties. In the text preview window, you can add formatting tags and format parts of a text string.
To learn more, see Manage annotation feature class properties.
Change the subtype or format
An annotation feature class contains one or more predefined annotation classes. Each annotation class in turn references a text symbol that you can customize. Multiple annotation classes appear as sublayers in a map.
For example, a text layer for annotating city water pressurized mains can contain several annotation classes for labeling distribution mains, hydrants, and pump mains in the same annotation group layer.
To learn more, see Annotation.
- On the Edit tab, in the Selection group, click Attributes
 .
.The Attributes pane appears.

- Click Select
 and select an annotation feature.
The selected features appears in a list.
- Click the Annotation tab.
- Expand the selection list and click the annotation feature you want to edit.
To edit a symbol property that is common to several annotation features, press the Ctrl key while clicking the features in the list.
- To change the subtype, click the annotation class drop-down arrow, and choose a subtype.
The text updates in the map.
- To change font settings, use the formatting controls.
The text updates in the map.
Add a background or a halo
The most common edits to a text symbol include adding effects such as a background callout to improve readability or a halo for emphasis in a complicated cap or to visually separate it from competing background information.
Adding a background callout preserves the reference to the text symbol. Other edits, such as adding a halo, disconnects the reference to the text symbol and changes the SymbolID attribute field value to -1.
When an annotation feature does not reference a text symbol, all symbol properties are stored in line with the feature in the attribute table. This increases storage requirements and can degrade display and query performance for the annotation layer.
To learn more, see Text symbols.
- On the Edit tab, in the Selection group, click Attributes
 .
.
The Attributes pane appears.

- Click Select
 and select an annotation feature.
The selected feature appears in a list.
- Click the Annotation tab.
- Expand the selection list and click the annotation feature you want to edit.
To edit a symbol property that is common to several annotation features, press the Ctrl key while clicking the features in the list.
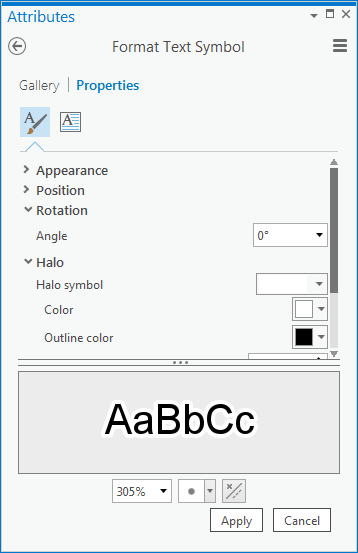
- Click the Annotation tab, and click Symbol.
The Format Text Symbol pane appears.

- Click Properties and click General.
- To add a background, click Callout, click the Callout symbol drop-down arrow and choose Background.
Adding a background callout preserves the reference to the text symbol.
- To add a halo, expand Halo, click the Halo symbol drop-down arrow and choose the halo symbol.
Adding a halo disconnects the reference and causes all symbol properties to be stored in line with the feature.
- Click Apply.
Add text formatting tags
Formatting tags override the properties defined by the associated text symbol. To format parts of a text string, enclose the text in a pair of starting and ending tags. The method and syntax is the same as using XML tags. Any unrecognized balanced tag pair is ignored by the parser.
To learn more, see Text formatting tags.
- On the Edit tab, in the Selection group, click Attributes
 .
.
The Attributes pane appears.

- Click Select
 and select an annotation feature.
The selected features appears in a list.
- Click the Annotation tab.
- Expand the selection list and click the annotation feature you want to edit.
To edit a symbol property that is common to several annotation features, press the Ctrl key while clicking the features in the list.
- In the preview window, click the text where you want to start the format change, and type the starting format tag.
- Click the text where you the format change to end, and type the matching ending tag.
- To apply your changes, do one of the following:
- Click the node in the selection list, or close the pane.
- If Auto Apply is unchecked, click the Apply button that appears at the bottom of the pane.
Keyboard shortcuts
When you select a text string by dragging the pointer across it, you can use the keyboard shortcuts in the following table to format the text.
| Keyboard shortcut | Action | Comment |
|---|---|---|
Ctrl+U | Apply underline. | Insert inline text formatting tags <UND> the selected text string </UND>. |
Ctrl+Shift+A | Apply all caps. | Insert inline text formatting tags <ACP> the selected text string </ACP>. |
Ctrl+Shift+K | Apply lowercase. | Insert inline text formatting tags <SCP> the selected text string </SCP>. |
Ctrl+Shift+Plus sign (+) | Apply superscript. | Insert inline text formatting tags <SUP> the selected text string </SUP>. |
Ctrl+Equal sign (=) | Apply subscript. | Insert inline text formatting tags <SUB> the selected text string </SUB>. |