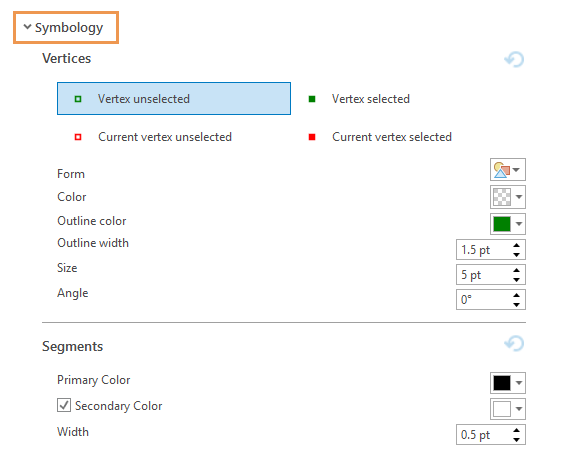
Project settings on the Editing tab include optional settings to customize the appearance of vertex handles and segments for unfinished geometry while creating or modifying features. These settings are available in the Symbology section.
- On the ribbon, click the Edit tab. In the Manage Edits group, click the Options dialog box launcher
 .
. - On the Options dialog box, click the Editing tab and expand the Symbology section.

- In the Vertices subsection, click the vertex handle you want to customize, choose a symbol form, and configure its color, width, size, and angle.
Vertex symbology is described in the following table:
Vertex unselected
Change the appearance of unselected vertices.
Vertex selected
Change the appearance of selected vertices.
Current vertex unselected
Change the appearance of the last vertex in a geometry sequence when it isn't selected.
Current vertex selected
Change the appearance of the last vertex in a geometry sequence when it is selected.
Reset to default

Reset all settings for Vertices to the default values.
- In the Segments subsection, confirm or change the following segment symbology settings.
Primary Color
Change the color of unfinished segments.
Secondary Color
Change the color of the dashed segments that appear at the center of segments.
Note:
Uncheck this setting to hide the secondary dashed lines.
Width
Change the display width of the segment symbology.
Reset to default

Reset all settings for Segments to the default values.
- Click OK.