Available with Location Referencing license.
Use the following steps to configure Location Referencing options in ArcGIS Pro.
- Open the project in which you want to set Location Referencing options.
- On the Location Referencing tab,
in the Routes group, click the Location Referencing Options button
 in the lower corner.
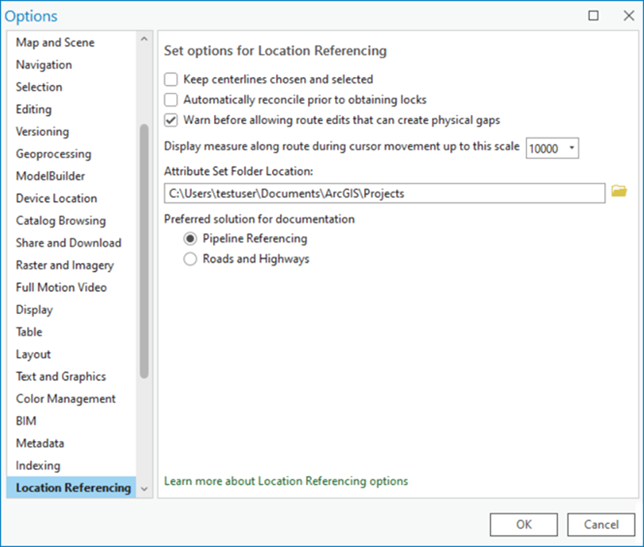
The Options dialog box appears with the Location Referencing tab active.
Tip:
You can also access Location Referencing options by clicking Project > Options and clicking the Location Referencing tab on the Options dialog box.

- Configure any of the following options as often as needed:
- Check the Keep centerlines chosen and selected check box to keep centerlines in the Location Referencing pane chosen as well as selected on the map after route edits. When this check box is unchecked, centerlines chosen in the Location Referencing pane are unchosen and selected features on the map are cleared.
- Check the Automatically reconcile prior to obtaining the locks check box to configure automatic lock reconciliation for conflict prevention.
- Uncheck the Warn before allowing route edits that can create physical gaps check box to disable the warning prompt that appears when a route edit will result in one or more physical gaps.
- Click the Display measure along route during cursor movement up to this scale drop-down list and choose a scale at which route and measure will appear while moving the pointer on the map in a feature service. The default is 1:10,000.
- Choose an alternate attribute set folder location using the Attribute Set Folder Location text box, either by clicking the Browse button
 to choose a folder other than the default location, or by entering the folder path in the text box.
 - Click either the Pipeline Referencing button or the Roads and Highways button in the Preferred solution for documentation section to set the solution documentation preference. Setting this preference causes the preferred solution documentation to load when context-sensitive help links are clicked.
- Click OK.