Before entering a traverse, make sure the distance and direction units are set correctly for the project. To set unit formats for your project , click the Project tab on the ArcGIS Pro ribbon and click Options to open the Options dialog box . Choose the Units tab under Project to view available unit settings.
Learn more about setting unit formats for editing
Set the project units
Ensure the units set for the project are the same as the units used in your spatial reference. Click the arrow next to the unit type (for example, Distance Units) to view which unit format is set as the default. The option under the Default field heading in the units table will be chosen for the unit format. For example, the default unit format chosen for Distance Units is Foot. If your spatial reference uses US feet as the distance unit, you need to change the default unit for Distance Units to Foot_US.
Tip:
When working with COGO, default units should be set for Distance Units, Area Units, and Direction Units.Add a unit format
To add a unit format to your project, first click the arrow next to the unit type to see the unit formats available. For example, Foot and Meter are available for Distance Units. Click <Select Unit Code> and choose a unit format to add to your project.
When entering dimensions in the traverse grid, you can click the unit drop-down arrow in the field to see the available unit formats for that dimension. The unit formats will include any unit formats you have added to your project.
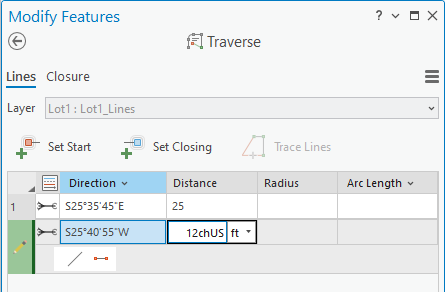
You can temporarily change the unit format of a field by clicking the units drop-down arrow and selecting a different unit format. The dimension entered in the field will be temporarily converted to the unit format selected from the drop-down arrow. For example, typing 25 in the Distance field (that uses feet) and choosing m (Meter) from the field drop-down arrow converts 25 feet to 7.62 meters. Once focus is shifted away from the field, the dimension is set back to 25 feet.
You can also type an override character to override the unit format set for the field. For example, if the unit format of the field is feet, typing 12chUS converts 12 US chains to feet.
Tip:
Type the unit abbreviation to override the current unit format for a field.
Set the number format for direction units
On the project Options dialog box, you can choose how to display directions by clicking the Format field for the direction code under Direction Units. On the Direction Formatting dialog box, you can set the number of decimal places and the base unit. For example, for the North Azimuth direction code, you can choose base units such as Degrees Minutes Seconds, Decimal Degrees, and Radians.