You can use table templates directly in the Create Features and Attributes panes or add them to existing feature templates to automatically insert rows into related tables when a feature is created.
Use the Create Features pane
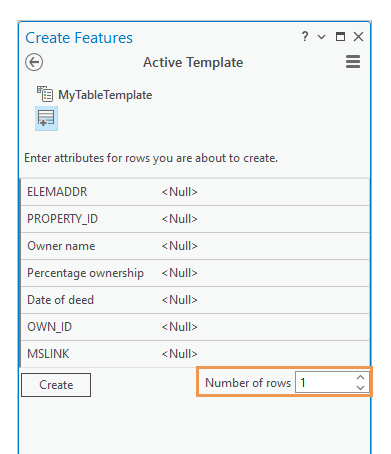
Use a table template in the Create Features pane to directly insert one or more rows into a target table and ignore any relationships in which the table is participating. You can override the set number of rows in the Active Template view.
To directly use a table template, complete the following steps:
- On the Edit ribbon tab, click Create
 .
.The Create Features pane appears.
- Click a table template.
Tip:
Table templates appear with a name and a table template icon
 .
. - Click the Active Template button
 .
. The Active Template view appears.
- Specify the number of rows.

- Click Create.
Use the Attributes pane
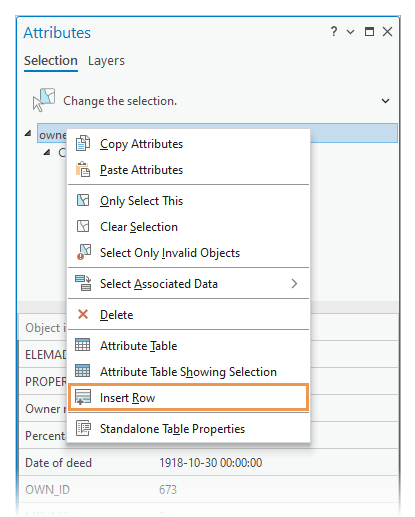
Use the Insert Row command  in the Attributes pane to insert one or more rows into a table for a selected feature. You can select a feature in the active map or select a row in an open table.
- On the Edit ribbon tab, click the Attributes command
 in the Selection group.
The Attributes pane appears.
- Click the Selection tab in the Attributes pane.
- Click the Select tool
 and select the features.
Alternatively, right-click the table in the Contents pane, click Open
 , and select a row in the table.
 The selected feature appears in the pane selection tree view.
- Expand the selection in the pane's selection view, right-click the table name, and click Insert Row
 .
.
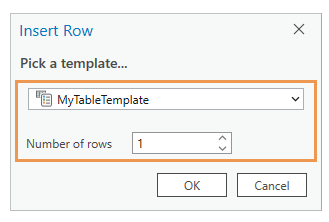
The Insert Row dialog box appears.
- Choose a table template and specify the number of rows.

- Click OK.
Add a table template to a feature template
Add a table template to an existing feature template to automatically insert rows into related tables when a feature is created. The feature template must create features that participate as the origin in a relationship class.
Table templates embedded in a feature template can streamline a workflow that otherwise requires additional steps using the Attribute pane to add a feature to a relationship each time a feature is created.
You can set a default origin primary key value or set the template to prompt for the origin primary key value. When you create a feature using the template, the specified number of rows is inserted into the destination table with the associated value in the foreign key field.
Tip:
To view the primary and foreign key for a relationship class in your project, right-click the relationship class in the Catalog pane, and click Properties. Relationship information is available on the General side tab.
To add or view table templates currently embedded in a feature template, complete the following steps:
- On the Edit ribbon tab, click Create
 .
.The Create Features pane appears.
- Click a feature template that creates features that participate as the origin in a relationship class in the active map.
- Right-click the template and click Properties
 .
. This command is also available in the Manage Templates pane.
The Template Properties dialog box appears.
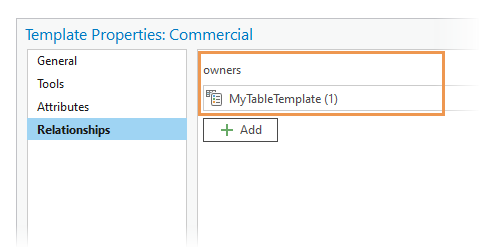
- Click the Relationships side tab.
This tab is only available if the feature template creates features that participate as the origin in a relationship class.
The names of the related tables and the embedded table templates appear at the top of this view.

- To add an existing table and specify the default number of rows, click Add
 .
. - Click OK or Cancel.