The Move tool  and Edit Vertices tool
  can select and move topological nodes when topological editing is turned on. These tools are available in the Modify Features pane.
Use the Move tool
Use the Move tool  Edges tab to select and move coincident topological nodes and stretch all connected edges. To select coincident nodes, press N while dragging the selection tool.
To move a topological node, complete the following steps:
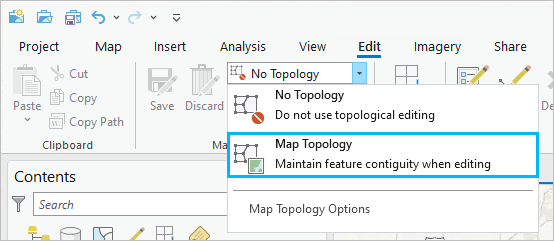
- On the ribbon Edit tab, in the Manage Edits group, click the Map Topology drop-down arrow and choose Map Topology
 .
. 
Tip:
To isolate topological editing to layers participating in a geodatabase topology rule in the active map, choose the Geodatabase Topology rule
 that appears in the Map Topology drop-down list.
 - In the Manage Edits group, in the Features group, click Modify Features
 .
.The Modify Features pane appears.
- Click the Move tool
 .
.To find the tool, expand Alignment, or type Move in the Search text box.
- Click the Edges tab.
Tip:
To display the topology graph only when hovering over a feature, set the display style to Select Elements. To learn more, see Configure map topology options.
The topology graph displays in the map.
- Click Select edge or node
 and press N and drag a selection across the nodes you are moving.
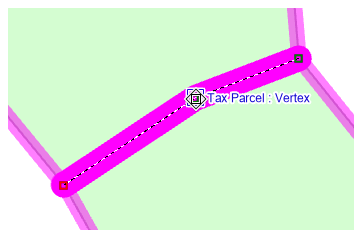
The selected nodes and connected topological edges appear in the selection view organized by layer. A selection anchor appears at the center (centroid) of the envelope for the entire selection set.
- In the selection view, review the check boxes for the selected edges and their origin layers.
- To temporarily disable editing for a layer or an edge and keep them in the selection set, uncheck the corresponding check box.
To turn a selection on or off, click the select box. Alternatively, right-click a selected item and click Unselect
 or Only Select This
  .
.
Tip:
To split a connection between one or more topological edges, disable editing for the feature or turn off the selection.
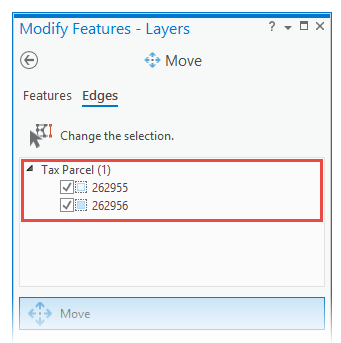
- Drag the topological node.
The selected node updates and topologically connected edges stretch and remain connected.
- Click Finish
 or press F2 to apply your changes.
Use the Edit Vertices tool
Use the Edit Vertices tool  Edges tab to select and move a single topological node and stretch connected edges.
- On the ribbon Edit tab, in the Manage Edits group, click the Map Topology drop-down arrow and choose Map Topology
 .
. 
Tip:
To isolate topological editing to layers participating in a geodatabase topology rule in the active map, choose the Geodatabase Topology rule
 that appears in the Map Topology drop-down list.
 - In the Manage Edits group, in the Features group, click Modify Features
 .
.The Modify Features pane appears.
- Click the Edit Vertices tool
 .
.To find the tool, expand Reshape, or type Vertices in the Search text box.
- Click the Edges tab.
Tip:
To display the topology graph only when hovering over a feature, set the display style to Select Elements. To learn more, see Configure map topology options.
The topology graph displays in the map.
- Click Select edge or node
 and click the node or the edge for the node you are moving.
The selected node and connected topological edges appear in the selection view organized by layer.
- In the selection view, review the check boxes for the selected node, connected topological edges, and origin layers.
- To temporarily disable editing for a layer or an edge and keep them in the selection set, uncheck the corresponding check box.
To turn a selection on or off, click the select box. Alternatively, right-click a selected item and click Unselect
 or Only Select This
  .
.
Tip:
To split a connection between one or more topological edges, disable editing for the feature or turn off the selection.
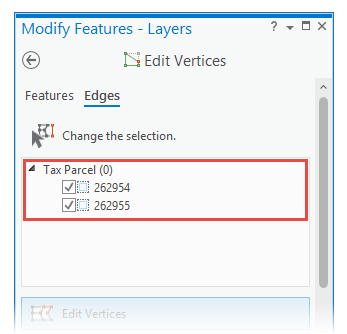
- Drag the node to the new location.
Alternatively, right-click the node and choose one of the following commands:
Command Description Move

Move the node by a specified X and Y distance.
Move To

Move the node to a specified coordinate location.
- Click Finish
 or press F2 to apply your changes.
Note:
If the new location violates a topological relationship, the edit operation fails to build polygons from the current topology elements and the Modify Edge error dialog box appears.
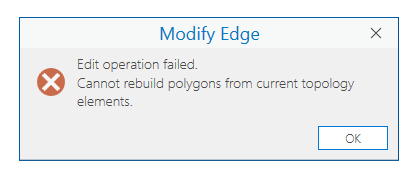
Click OK to close the dialog box and cancel the edit.
The node and connected edges update.