The Define Line Portion tool  edits the vertices for a portion of a linear route feature identified by tracing and clicking two points along the route. This tool is available in the Modify Features pane.
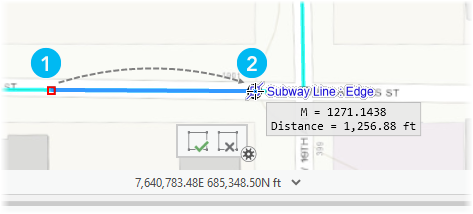
As you trace along the selected route, the current m-value appears near the pointer in a pop-up. After defining the portion to edit, you can edit m-values in the geometry properties table or right-click and use the m-value commands.
To define a portion of a route, complete the following steps:
- On the Edit tab, choose your snapping preferences, and show the Modify Features pane.
- In the Snapping group, click the Snapping drop-down menu
 and enable your snapping preferences.
 - In the Features group, click Modify
 .
.
- In the Snapping group, click the Snapping drop-down menu
- Expand Route, and click Define Line Portion
 .
.- To exit the tool, press Esc.
- In the tool pane, click Select
 , and select the route feature.
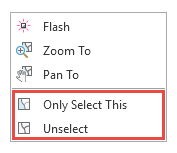
- To refine the selection, right-click a feature in the tree view, and click Unselect
 or Only Select This
  .
.
- To refine the selection, right-click a feature in the tree view, and click Unselect
- Trace the portion of the linear route you want to edit by clicking two points.
- Click the first point on the linear route.
- Click the second point on the linear route.
After clicking the second point, the selected feature vertices for the defined portion are editable and their values appear in the geometry properties table.

Tip:
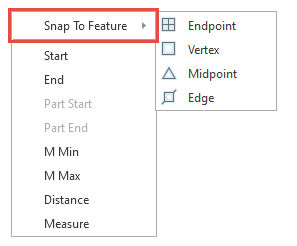
To snap to specific feature geometry without changing your snapping preferences, right-click and click Snap to Feature.

- To remeasure this portion of the route, edit the m-values in the geometry properties table or right-click a segment, click M Value, and click the corresponding command.
Insert Vertex At M

Insert a vertex at a specified Measure value in the same direction in which the m-values are increasing.
Apply Factor

Multiply all m-values by a specified Factor value.
Offset

Sum each m-value with a specified Offset value.
Calculate NaN

Replace all unknown (NaN) m-values with a value that is interpolated or extrapolated from existing m-values.
Drop Measures
Reset all m-values to unknown (NaN).
Set As Distance

Assign m-values to all vertices starting with a specified Starting M value and interpolating the remaining values across the geometry length of the feature.
Set From/To

Assign the specified From and To m-values to the start and end of the feature, respectively.
Set Direction As M

Flip the geometry direction to match the direction in which the m-values are increasing.
- To move, add, or delete vertices or edit segments, right-click a vertex or a segment and click the corresponding command, or use the commands on the toolbar.

Select Vertex

Select and drags vertices. Click the drop-down arrow to change the selection method.
Add

Add a vertex with each click.
Delete

Delete the clicked vertex.
Stretch Proportionately

Preserve the general shape of the selected feature by scaling segments proportionately when you move a vertex. This setting is turned off by default.
- To finish the feature, right-click and click Finish
 , or press the F2 key.